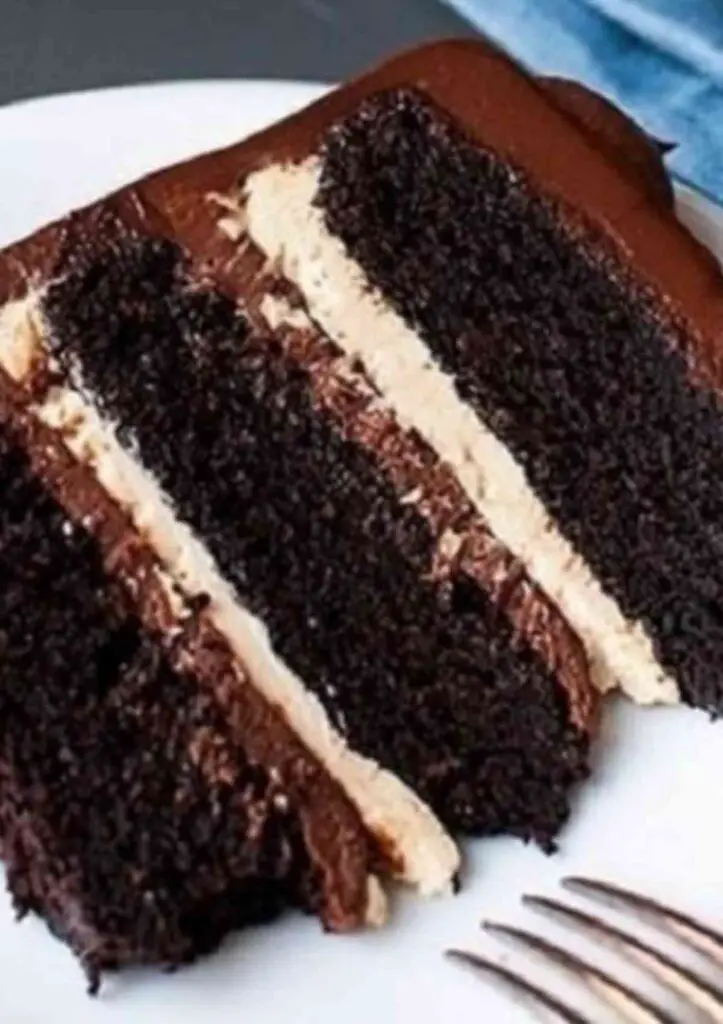
Calling all dessert enthusiasts! Are you ready to embark on a flavor adventure unlike any other? Then look no further than the Chocolate Caramel Crunch Cake. This decadent masterpiece is a symphony of rich, dark chocolate, creamy caramel, and a delightful crunch that will tantalize your taste buds and leave you wanting more.
This recipe is perfect for those who want to impress their guests with a show-stopping dessert. It may seem complex at first glance, but with careful planning and following our detailed instructions, you’ll be a chocolate caramel connoisseur in no time!
A History Steeped in Sweetness: The Origins of Chocolate Caramel
The exact origin of the Chocolate Caramel Crunch Cake is a bit of a mystery. However, both chocolate and caramel boast long and fascinating histories. Chocolate’s roots can be traced back to the ancient Mesoamerican civilizations, where it was consumed as a bitter beverage. Caramel, on the other hand, is believed to have originated in the Middle East, where it was made by heating sugar until it became golden and sticky.
The marriage of these two flavors is a stroke of culinary genius. Chocolate’s rich depth perfectly complements the sweetness of caramel, while the added crunch provides a delightful textural contrast. The Chocolate Caramel Crunch Cake is a testament to the power of combining classic flavors to create something truly special.
Tools You’ll Need and How Many Can You Share This Delight With?
Before you dive into this delightful recipe, let’s gather the necessary tools:
- Mixing bowls (various sizes)
- Electric mixer (stand or hand mixer)
- Saucepans (different sizes)
- Silicone spatula
- Whisk
- Rubber spatula
- Measuring cups and spoons
- 8-inch cake pans (3)
- Parchment paper
- Baking sheet
- Wire rack
- Electric mixer (for whipping cream)
This recipe yields a glorious cake that can easily serve 12 to 14 people. It’s perfect for birthday celebrations, potlucks, or simply indulging in a decadent treat with loved ones.
The preparation time is around 1 hour, with an additional 50 minutes of baking time. So, set aside a relaxing afternoon to create this masterpiece.
Ingredients: A Breakdown for Baking Success
Here’s a breakdown of the ingredients you’ll need for this recipe, along with some helpful substitutions:
For the Devil’s Food Cake:
- 1 ½ cups (340 grams) unsalted butter, room temperature: This is crucial for achieving a smooth and airy cake. If your butter is too cold, it won’t cream properly. Let it soften at room temperature for about 30 minutes.
- 1 ½ cups black coffee: The coffee enhances the chocolate flavor and adds a slight bitterness that cuts through the sweetness of the cake. You can substitute strong brewed tea if you prefer.
- 1 cup (85 grams) Dutch-process cocoa powder: Dutch-process cocoa powder has a deeper and richer chocolate flavor compared to regular cocoa powder. It also reacts with the baking soda to create a slight rise in the cake.
- 6 ounces (170 grams) finely chopped dark chocolate, roughly 72% cocoa: The higher the cocoa percentage, the richer and more intense the chocolate flavor will be. You can adjust the cocoa percentage based on your preference.
- 2 cups (455 grams) light brown sugar, packed: Light brown sugar adds a touch of molasses flavor that complements the chocolate beautifully. Granulated sugar can be used as a substitute, but the cake might not be as moist.
- 1 tablespoon vanilla extract: Pure vanilla extract is recommended for the best flavor.
- 1 teaspoon kosher salt: Salt enhances all the other flavors in the cake. Don’t skip it!
- 7 large eggs, room temperature: Similar to the butter, room temperature eggs are essential for even mixing and proper cake rise.
- 2 cups (255 grams) all-purpose flour: This is the base of your cake structure. Make sure you spoon and level the flour accurately to avoid a dense cake.
- 1 tablespoon baking soda: This leavening agent helps the cake rise.
For the Caramel Ganache:
- 10 ounces (284 grams) semisweet or bittersweet chocolate, chopped or chips: The chocolate in the ganache adds another layer of chocolate flavor to the cake. You can use the same chocolate you used for the cake batter.
- ½ cup (100 grams) granulated sugar: This creates the sweetness and caramel flavor in the ganache.
- 2 tablespoons water: This helps to dissolve the sugar and create a smooth consistency.
- 1 cup (230 grams) heavy cream: Heavy cream is necessary for creating a rich and creamy ganache. You can substitute whipping cream, but the ganache may not be as thick and may set softer.
- 2 tablespoons (28 grams) unsalted butter: Butter adds richness and smoothness to the ganache.
For the Hazelnut Caramel Crunch:
- ¾ teaspoon baking soda: This helps the caramel puff up slightly and creates a light and airy texture.
- ¾ cup (150 grams) granulated sugar: This forms the base of the caramel.
- 2 tablespoons water: This helps to dissolve the sugar and prevent burning.
- 2 tablespoons corn syrup: Corn syrup helps prevent the sugar from crystallizing and ensures a smooth caramel texture.
- 1 cup (124 grams) hazelnuts, toasted: Hazelnuts add a delicious nutty flavor and a satisfying crunch. You can substitute other nuts like almonds or pecans if you prefer.
For the Whipped Cream Filling:
- 1 ½ cups (345 grams) heavy cream: Heavy cream is essential for creating a stable and fluffy whipped cream filling.
- 1 cup (232 grams) creme fraiche: Creme fraiche adds a slight tanginess and richness to the whipped cream, balancing the sweetness. You can substitute sour cream if you don’t have creme fraiche.
- ¼ cup light brown sugar: This sweetens the whipped cream filling. Powdered sugar can be used as a substitute, but it may dissolve too quickly and make the whipped cream too thin.
Baking Bliss: Step-by-Step Guide to Chocolate Caramel Crunch Cake Perfection
Now that you have all the ingredients prepped, let’s embark on the delightful journey of baking this masterpiece!
Preparing the Devil’s Food Cake:
- Preheat your oven to 350°F (180°C) and grease and line three 8-inch cake pans with parchment paper.
- In separate bowls, measure out all your ingredients for the cake batter. This ensures accurate measuring and avoids any mixing mishaps.
- In a saucepan, melt the butter and coffee together over low heat. Remove from heat and whisk in the cocoa powder, chopped chocolate, brown sugar, vanilla extract, and salt. Let the mixture cool slightly.
- In a large bowl, using an electric mixer, beat the room temperature eggs until light and fluffy. Gradually add the cooled chocolate mixture and continue beating until well combined.
- Sift the flour and baking soda together in a separate bowl. Gradually add the dry ingredients to the wet ingredients, mixing until just combined. Don’t overmix!
- Divide the batter evenly among the three prepared cake pans. Bake for 30 minutes, or until a toothpick inserted into the center comes out clean.
- Let the cakes cool in the pans for 20 minutes before transferring them to a wire rack to cool completely.
Making the Caramel Ganache:
- While the cakes cool, prepare the ganache. Place the chopped chocolate in a heat-resistant bowl.
- In a saucepan, heat the sugar and water over medium heat until it reaches a dark amber color. Be careful not to burn the sugar!
- Once the sugar reaches the desired color, remove the pan from heat and carefully whisk in the heavy cream and butter. The mixture might bubble vigorously, so be cautious.
- Pour the hot cream mixture over the chocolate and let it sit for 5 minutes. Then, using a whisk, gently stir the mixture until smooth and glossy.
- Allow the ganache to cool slightly and reach a spreading consistency.
Creating the Hazelnut Caramel Crunch:
- Line a baking sheet with parchment paper for easy cleanup.
- In a saucepan, combine the sugar, water, and corn syrup. Heat the mixture over medium heat until it reaches a light amber color.
- Once the sugar reaches the desired color, remove the pan from heat and carefully stir in the toasted hazelnuts and baking soda. The mixture will bubble, so be cautious.
- Pour the hot caramel mixture onto the prepared baking sheet and spread it out into an even layer. Let the caramel cool completely and harden.
Whipping the Cream Filling:
- In a chilled bowl, using an electric mixer, whip the heavy cream, creme fraiche, and brown sugar until stiff peaks form. Be careful not to overwhip, or the cream will become curdled.
Assembling the Cake:
- Once all the components are cool and prepared, it’s time for the fun part: assembling the cake!
- Place the first cake layer on a serving platter or cake stand. Spread a generous amount of whipped cream filling over the top.
- Break the cooled hazelnut caramel crunch into pieces and sprinkle them over the whipped cream layer.
- Repeat step 3 with the remaining cake layers, whipped cream filling, and hazelnut caramel crunch. Make sure the top layer of the cake is the prettiest, as that will be the showcase.
- Once the cake is assembled, pour about half of the cooled ganache over the top and sides, creating a crumb coat. A crumb coat is a thin layer of icing that helps trap crumbs and create a smooth canvas for the final coat.
- Refrigerate the cake for 20 minutes to allow the crumb coat to harden.
- After 20 minutes, remove the cake from the refrigerator and pour the remaining ganache over the top and sides, creating a smooth and even final coat.
- Decorate the top of the cake with additional pieces of hazelnut caramel crunch for a touch of elegance and textural contrast.
Tips for Success:
- Ensure all your ingredients are at room temperature before starting. This allows for even mixing and a smooth cake batter.
- Don’t overmix the cake batter. Once the dry ingredients are just incorporated, stop mixing. Overmixing can lead to a dense and tough cake.
- Be patient when making the caramel. Watch it closely and don’t let it burn. The desired color is a deep amber, not brown.
- Allow the ganache to cool slightly before using it as a crumb coat. If it’s too hot, it will melt the cake.
- Refrigerating the cake after the crumb coat helps trap crumbs and creates a neater final finish.
Top 5 Mistakes to Avoid and How to Conquer Them:
- Using cold ingredients: Cold ingredients can lead to a lumpy cake batter and uneven mixing. Make sure your butter, eggs, and buttermilk are all at room temperature before starting.
Solution: Take out your butter and eggs at least 30 minutes before baking. You can also warm buttermilk slightly in the microwave.
- Overmixing the batter: Overmixing the batter incorporates too much air, which can make the cake tough and dense. Mix the batter until just combined, then stop.
Solution: Mix the dry ingredients into the wet ingredients until there are no streaks of flour remaining. Resist the urge to overmix!
- Underbaking the cake: An underbaked cake will be crumbly and may collapse in the center. Use a toothpick test to check for doneness. Insert a toothpick into the center of the cake; it should come out clean.
Solution: Bake the cake for the recommended time, but start checking it a few minutes early. If the toothpick comes out with wet batter, bake for a few more minutes.
- Using hot ganache for crumb coat: Hot ganache will melt the cake layer. Allow the ganache to cool slightly and reach a spreading consistency before using it as a crumb coat.
Solution: Let the ganache cool for about 15 minutes after whisking it together. It should be pourable but not runny.
- Not letting the cake cool completely before assembling: A warm cake will cause the whipped cream filling to melt and make the cake difficult to assemble. Make sure all the components are cool before frosting and assembling the cake.
Solution: Let the cake layers cool completely on a wire rack before frosting. The whipped cream filling can be prepared while the cake cools.
Frequently Asked Questions:
Q: Can I make the cake layers in advance?
A: Absolutely! You can bake the cake layers a day ahead of time. Wrap them tightly in plastic wrap and store them at room temperature.
Q: What’s the best way to store leftovers?
A: Keep the assembled cake in an airtight container in the refrigerator for up to 3 days. The caramel crunch topping might soften slightly, but the cake will still be delicious.
Q: Can I substitute the hazelnuts?
A: Of course! Almonds or pecans would be wonderful alternatives for the hazelnut caramel crunch. You can even use a mix of different nuts for added flavor and texture.
A Sweet Conclusion: Indulge in a Symphony of Flavor
The Chocolate Caramel Crunch Cake is a true masterpiece, a delightful symphony of flavors and textures that will tantalize your taste buds and leave you wanting more. With careful planning and following our detailed instructions, you can recreate this culinary wonder in your own kitchen. So, preheat your oven, gather your ingredients, and embark on this delicious adventure!