Welcome, chocolate enthusiasts, to a realm of pure indulgence! Today, we embark on a delicious journey to create Fantasy Fudge, a symphony of flavors that will tantalize your taste buds and leave you wanting more.
This exquisite recipe combines the rich decadence of chocolate chips with the smooth sweetness of marshmallow creme, all held together by a perfectly textured fudge base. Toasted walnuts add a delightful crunch, making each bite an explosion of textures and tastes.
So, are you ready to unleash your inner chocolatier? Let’s get started!
A History Steeped in Sweetness: The Origins of Fantasy Fudge
While the exact origin of Fantasy Fudge remains a delightful mystery, its flavors evoke a sense of nostalgia and homemade goodness. The use of evaporated milk, a staple ingredient in many classic desserts, hints at its roots in American kitchens.
The addition of marshmallow creme, a relatively recent innovation, suggests this recipe might have emerged in the mid-20th century. Regardless of its historical background, Fantasy Fudge has become a beloved treat, enjoyed by families and friends for generations.
Gather Your Tools and Embrace the Magic (Yields 16 squares)
Before we embark on our culinary adventure, let’s ensure we have the necessary tools:
- Saucepan or Pot: A medium-sized saucepan or pot will be your trusty companion for melting the ingredients.
- Candy Thermometer (Optional): This tool helps ensure the sugar mixture reaches the perfect temperature for a flawless fudge consistency.
- Spatula: A trusty spatula will be your partner in crime for stirring the mixture smoothly.
- 8-inch Square Pan: This will be the mold for your delectable fudge creation.
- Parchment Paper: Parchment paper lines the pan, making it easier to remove the fudge later.
- Cutting Board and Knife: Prepare to slice your masterpiece into bite-sized squares of joy.
This recipe is perfect for a small gathering of 4-6 people. It takes approximately 19 minutes to prepare and cook, making it ideal for a quick and delightful dessert.
The Ingredients: A Symphony of Sweetness
Now, let’s gather the ingredients that will weave their magic into your Fantasy Fudge:
- 1 ½ cups Sugar: The foundation of the fudge’s sweetness. You can substitute granulated sugar with brown sugar for a deeper, richer flavor.
- ⅓ cup Butter: Unsalted butter adds richness and creaminess. For a vegan option, use vegan butter or coconut oil.
- ⅓ cup Evaporated Milk: This key ingredient adds creaminess and helps bind the mixture together. You can substitute it with condensed milk for a slightly sweeter fudge, but be aware it will set softer.
- 8 oz. Semi-sweet Chocolate Chips: The heart and soul of the chocolatey indulgence. Feel free to use dark chocolate chips for a more intense flavor or milk chocolate chips for a sweeter taste.
- 3 oz. Marshmallow Creme (Marshmallow Fluff): This delightful ingredient adds a touch of marshmallowy sweetness and a smooth texture. If unavailable, you can substitute with 1/2 cup of melted white chocolate and 1/4 cup of marshmallow fluff spread.
- ½ cup Chopped Walnuts (Optional): These add a delightful crunch and a nutty flavor. You can substitute other nuts like pecans, almonds, or even chopped peanuts for a unique twist. Feel free to omit them entirely if you prefer a nut-free fudge.
- ½ teaspoon Vanilla Extract: Pure vanilla extract enhances the overall flavor profile, adding a subtle depth.
Step-by-Step Guide: Conjuring Up Your Fantasy Fudge
Now, let’s unveil the magical steps to creating your very own Fantasy Fudge:
- Prepare the Canvas: Lovingly line your 8-inch square pan with parchment paper, ensuring it overhangs the edges for easy removal later.
- Summon the Sweetness: In your chosen saucepan or pot, combine the sugar, butter, and evaporated milk. Heat the mixture over medium heat, stirring constantly, until it reaches a rolling boil.
- Temper the Magic: If using a candy thermometer, continue cooking and stirring the mixture until it reaches 234°F (112°C). This ensures the fudge sets perfectly. If you don’t have a thermometer, cook for about 4 minutes after boiling, stirring constantly.
- Unleash the Chocolatey Power: Remove the pan from the heat and stir in the chocolate chips and marshmallow creme until they are completely melted and smoothly incorporated.
- Incorporate the Crunchy Delight: (Optional) If using walnuts, gently fold them into the mixture along with the vanilla extract.
- Cast the Spell: Pour the hot fudge mixture into your prepared 8-inch square pan lined with parchment paper. Gently tap the pan on the counter to release any air bubbles trapped within the fudge.
- A Chill Awaits: Let the fudge cool completely at room temperature for about 30 minutes. This initial cool down helps set the fudge slightly.
- Embrace the Fridge’s Embrace: Once the fudge has cooled slightly, transfer the pan to the refrigerator. Cover the pan loosely with plastic wrap or another sheet of parchment paper to prevent the fudge from absorbing any unwanted fridge smells. Let the fudge chill for at least 2 hours, or until completely firm.
Tips for Unrivaled Fantasy Fudge Success:
- Temperature is Key: Be mindful of the temperature when cooking the sugar mixture. If it doesn’t reach the desired temperature (or gets too hot), your fudge might not set properly.
- Patience is a Virtue: Resist the urge to dig in right away! Allow the fudge to cool completely before cutting to ensure clean and beautiful squares.
- Embrace Customization: This recipe is a fantastic starting point! Feel free to get creative and personalize your fudge with your favorite mix-ins. Explore options like dried fruits, chopped candies, or even a sprinkle of sea salt for a delightful sweet and salty contrast.
Top 5 Mistakes to Avoid and Keep Your Fudge Flawless:
- Rushing the Cooking Process: Don’t skip the boiling time or the temperature check. An undercooked fudge mixture will result in a soft, gooey mess.
- Overheating the Ingredients: Be gentle when melting the butter and chocolate chips. Overheating can scorch them, leading to a burnt flavor and an unpleasant texture.
- Forgetting the Parchment Paper: Lining your pan with parchment paper is a lifesaver! It allows for easy removal of the fudge without any sticky mishaps.
- Cutting Too Early: Patience is key! Ensure the fudge is completely chilled and firm before slicing to avoid crumbling or uneven squares.
- Improper Storage: Store your fudge in an airtight container at room temperature for up to 2 weeks, or in the refrigerator for up to 4 weeks. For longer storage, you can freeze it for up to 3 months.
Fantasy Fudge FAQs: Unveiling the Mysteries
Q1: How long can I store Fantasy Fudge?
A1: Properly stored, you can enjoy Fantasy Fudge at room temperature for 1-2 weeks or in the fridge for 3-4 weeks. Freeze it for up to 3 months for extended storage.
Q2: Can I customize the add-ins for this fudge?
A2: Absolutely! Feel free to unleash your creativity and add your favorite mix-ins like chopped dried fruits, different nuts, or even a sprinkle of sea salt for a sweet and salty twist.
Q3: Can I use dark chocolate chips instead of regular chocolate chips?
A3: Yes, you can substitute dark chocolate chips for a more intense chocolate flavor. You can also use milk chocolate chips for a sweeter taste.
Q4: What if I don’t have evaporated milk?
A4: You can substitute evaporated milk with condensed milk for a slightly sweeter fudge, but be aware it will set softer.
Q5: I don’t have a candy thermometer. How can I tell if the sugar mixture is cooked?
A4: If you don’t have a candy thermometer, cook the mixture for about 4 minutes after it reaches a rolling boil, stirring constantly. You can also try the “softball stage” test. Drop a small amount of the hot mixture into a bowl of cold water. If it forms a soft, pliable ball that you can easily mold with your fingers, the sugar mixture is cooked.
A Sweet Ending: The Enchantment of Fantasy Fudge
The journey to create Fantasy Fudge is a delightful one, filled with the promise of pure chocolatey indulgence. With its rich flavor, smooth texture, and delightful crunch, this recipe is sure to become a cherished favorite. So, gather your ingredients, unleash your inner chocolatier, and embark on this magical culinary adventure. Share the joy of Fantasy Fudge with loved ones and create memories that will last a lifetime.
Fantasy Fudge: Beyond the Basics
This recipe provides a fantastic foundation for your Fantasy Fudge adventures. But why stop there? Let’s explore some exciting variations to tantalize your taste buds:
- Fruity Fantasy: For a burst of fruity sweetness, consider incorporating dried cranberries, chopped cherries, or chopped dried apricots into your fudge.
- Peanut Butter Power: Add a creamy and nutty twist by swirling in 1/3 cup of peanut butter or your favorite nut butter before pouring the fudge into the pan.
- The Minty Marvel: For a refreshing twist, incorporate 1/4 teaspoon of peppermint extract alongside the vanilla extract. You can even add crushed candy canes for a festive touch.
- Spice Up Your Life: For a touch of warmth, consider adding a pinch of ground cinnamon, nutmeg, or even a sprinkle of cayenne pepper for a surprising kick.
- The Salted Symphony: For a delightful sweet and salty contrast, sprinkle a pinch of flaky sea salt over the top of the fudge after pouring it into the pan.
Presentation Perfection: The Art of Serving Fantasy Fudge
Once your Fantasy Fudge has chilled and is beautifully set, it’s time to unleash your inner artist and present it with flair! Here are some ideas:
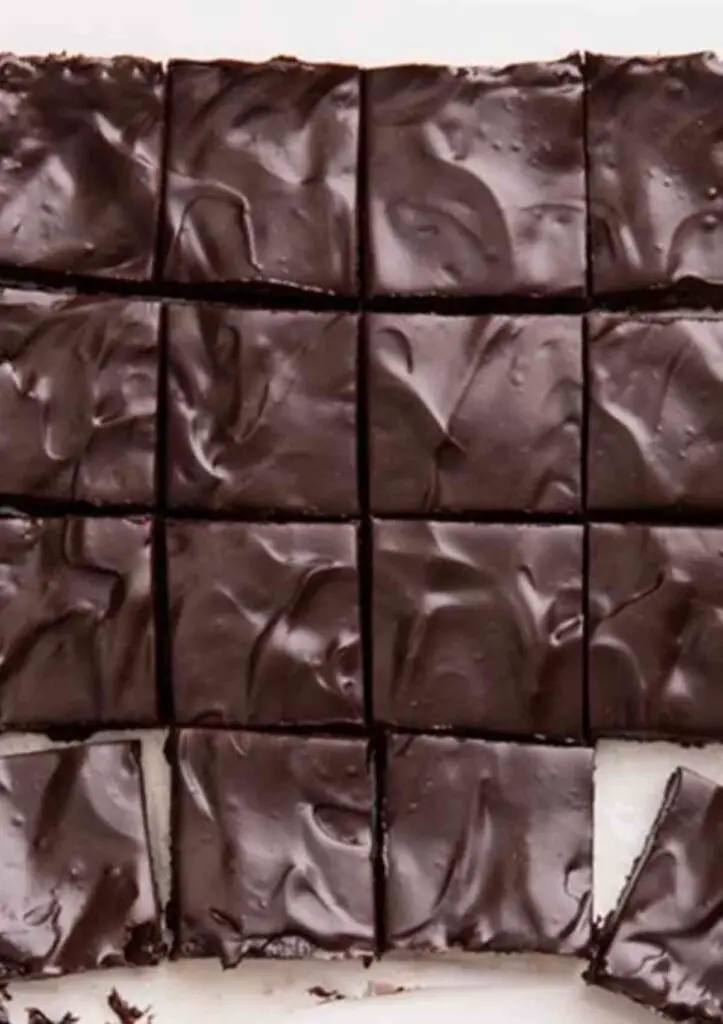
- Classic Squares: Cut the fudge into uniform squares for a timeless presentation. You can use a sharp knife or a heated knife (dipped in hot water in between cuts) for clean edges.
- Festive Fancies: For a special occasion, use cookie cutters to cut the fudge into fun shapes like hearts, stars, or even snowflakes.
- Drizzle Delight: For an extra touch of decadence, drizzle melted chocolate, white chocolate, or caramel over the top of the chilled fudge before cutting. You can even get creative with sprinkles, chopped nuts, or dried fruit for added flair.
- Fudge Fancy Boxes: Package your homemade fudge in decorative boxes or small cellophane bags tied with colorful ribbons for a delightful homemade gift.
In Conclusion: The Enduring Magic of Fantasy Fudge
Fantasy Fudge is more than just a dessert; it’s an experience. It’s the joy of creating something delicious from scratch, the anticipation of the sweet reward, and the pleasure of sharing it with loved ones. With its endless customization possibilities and delightful flavor combinations, this recipe offers a canvas for your culinary creativity. So, grab your ingredients, embrace the magic, and embark on your own Fantasy Fudge adventure.